Connecting to Google BigQuery using Python
Published 2021-01-05
At the end of this tutorial we’ll be able to perform CRUD (Create/Read/Update/Delete) actions with Python on data inside Google BigQuery. Using a service account, preparing the code for another cloud service to use in production will be a smooth next step.
Why did I choose BigQuery?
I’m a fan of products that can auto scale and that have a generous free tier. A few years ago when I first tried Amazon Web Services (AWS) and Google Cloud Platform (GCP), I got a better feel for GCP so decided to start learning on it. At the time of writing, there also isn’t a free tier for any SQL databases on AWS.
Why use Python with BigQuery?
Pulling data from the internet is likely possible with Python or Javascript. Python is a bit easier for me. It makes sense to store our data somewhere durable and easily accessible for later.
GCP / BigQuery Setup
New Project
Once you’ve signed up to GCP. You’ll set up a project.
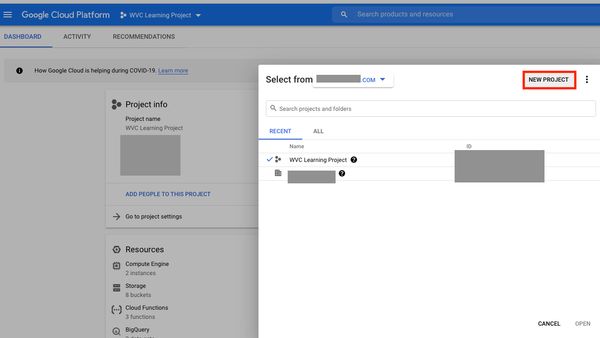
Give the project a fun name! I find the auto-generated ID names pretty interesting (what a time to be alive haha).
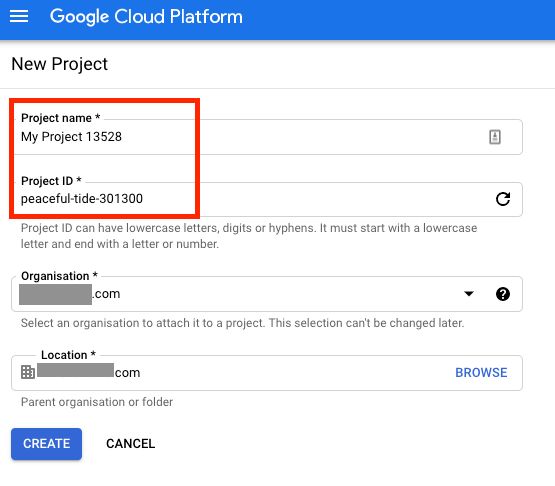
I'm going to use my existing WVC Learning Project. Next we'll need to set up a service account to authenticate. A service account is a set of credentials made for machine-to-machine communication, so our completed system will be hands free 👋
Enable BigQuery API
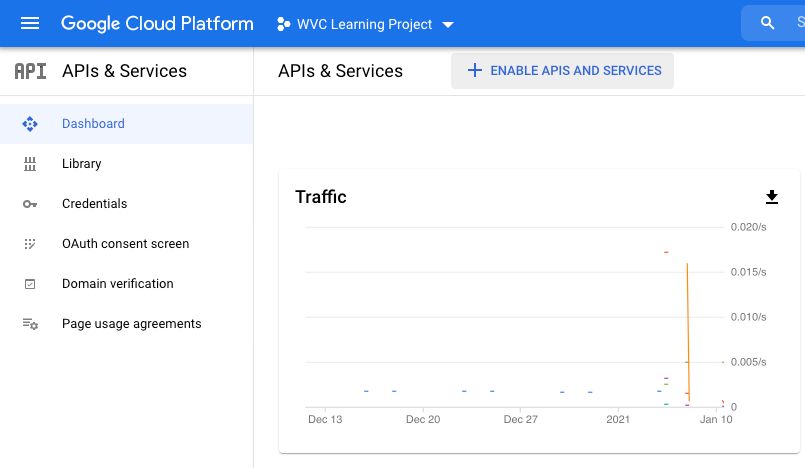
Head to API & Services > Dashboard
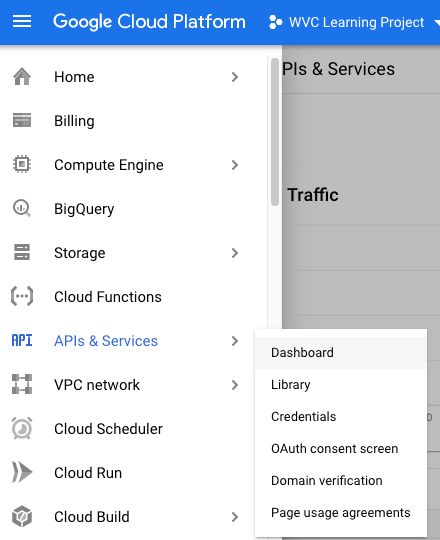
Click Enable APIS and Services
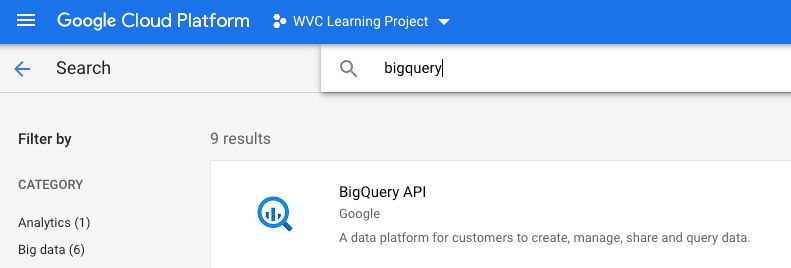
Search BigQuery
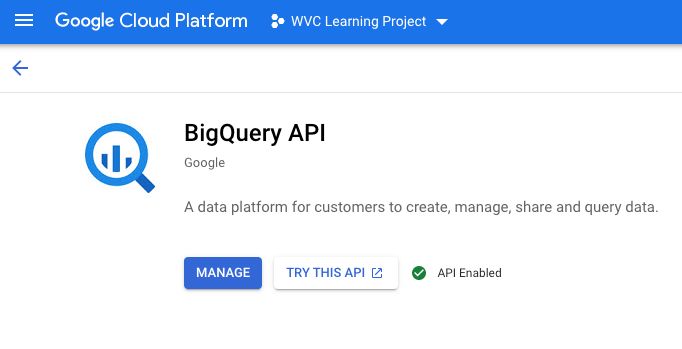
Enable BigQuery API. Mine says Manage because I’ve already enabled it, but yours should say “Enable”.
Create Service Account
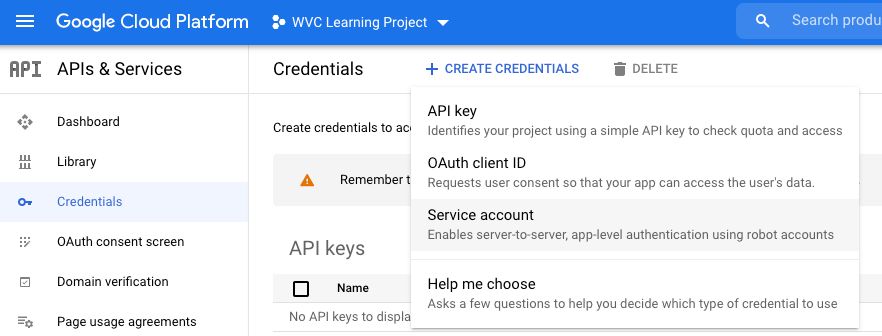
In the left menu head to APIs & Services > Credentials
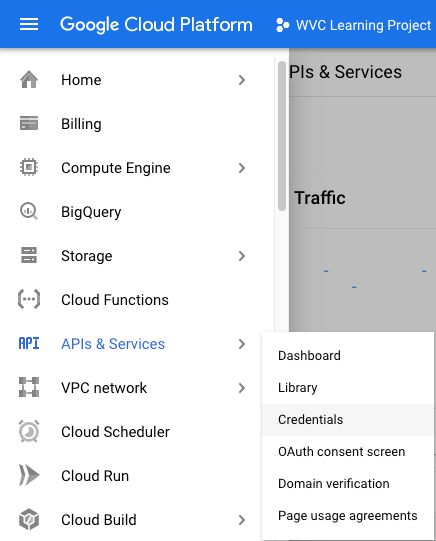
Create Credentials > Service Account
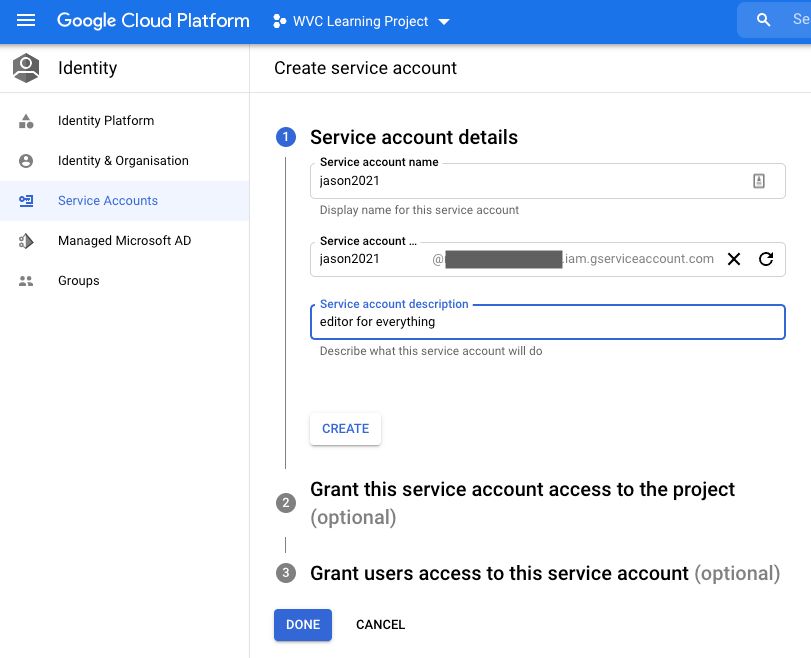
Part 1. Service Account Details
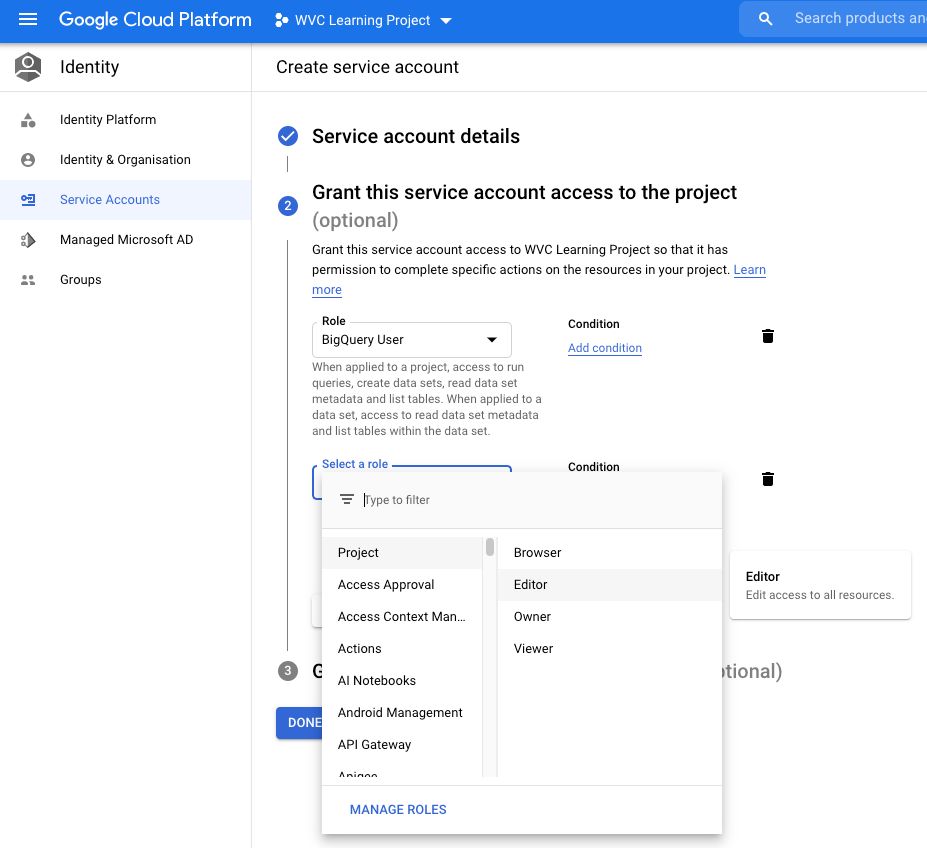
Part 2. Service Account Project Access
This step grants the service account access to parts of the project. We should select at least “BigQuery User”. Type it into the Role Filter as there are too many Roles to scroll through. What I found a bit deceptive is that any of the “Project” level roles which have “Some amount” of access to all resources, don’t have access to BigQuery.
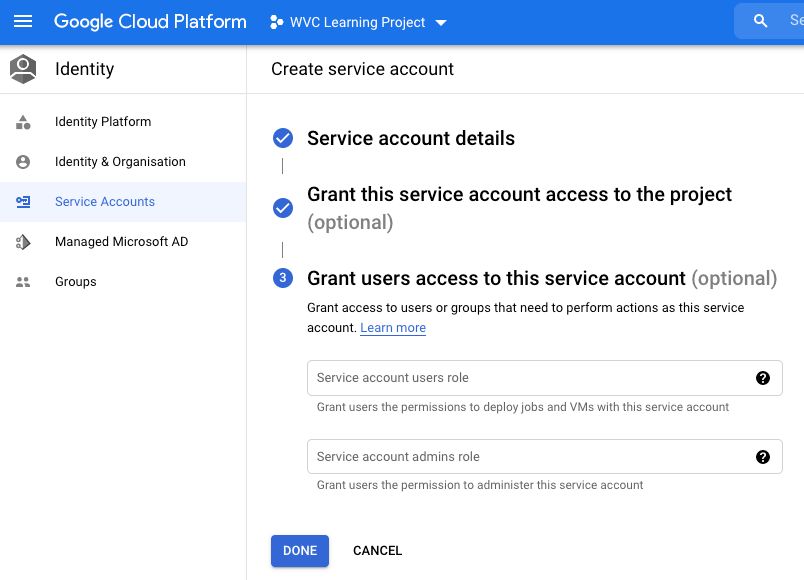
Part 3. Service Account User Access
This step allows users to have access to this service account.
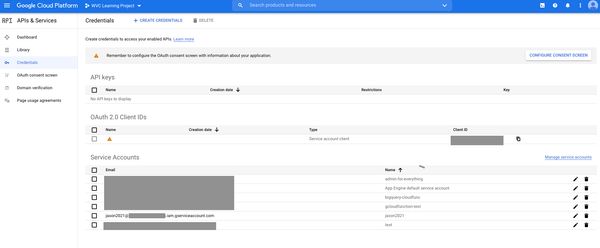
Our Service Account now shows up on the list. Now we want to create a key. Click the name of the service account or the edit pencil.
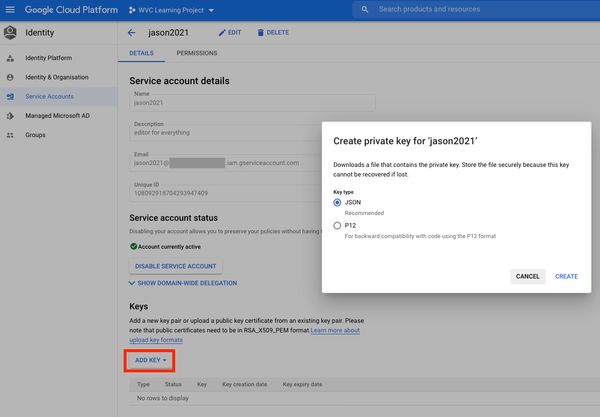
Click Add Key > Choose JSON > Click Create
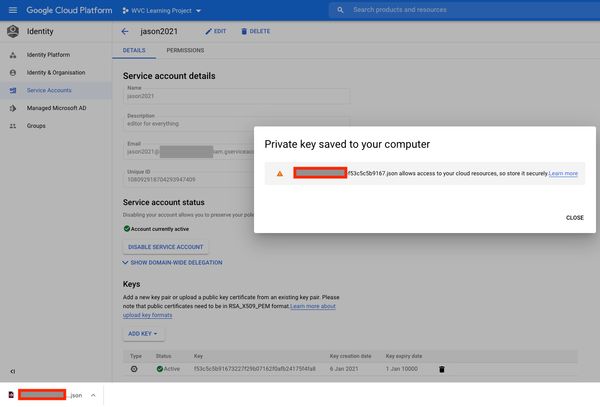
Download the private key. We’ll use this later.
Inside the JSON file has this structure:
{
  "type": "service_account",
  "project_id": "your project id",
  "private_key_id": "your private key id",
  "private_key": "-----BEGIN PRIVATE KEY-----...-----END PRIVATE KEY-----\n",
  "client_email": "your client email.iam.gserviceaccount.com",
  "client_id": "your client id",
  "auth_uri": "https://accounts.google.com/o/oauth2/auth",
  "token_uri": "https://oauth2.googleapis.com/token",
  "auth_provider_x509_cert_url": "https://www.googleapis.com/oauth2/v1/certs",
  "client_x509_cert_url": "https://www.googleapis.com/robot/v1/metadata/x509/...iam.gserviceaccount.com"
}
With this JSON key we’re now ready to use the API.
Google Colab Setup
The way I typically teach Python is using Google Colab Notebooks. Colab gives us a free cloud Virtual Machine (VM) to play with. The VM you get is randomly provisioned but comes with the following or similar specifications, which is plenty for learning. The free version can run for a maximum of 12 hours, so we won’t be able to do anything production worthy here.
Python 3+, many libraries pre-installed and Google’s version of Jupyter Notebook/Lab
1 CPU (2 cores)
12GB+ RAM
60GB+ SSD
If you need them:
- GPU: Possibility of getting Nvidia K80s, T4s, P4s and P100s
- TPU
Create a new notebook, save it in Google Drive or Github.
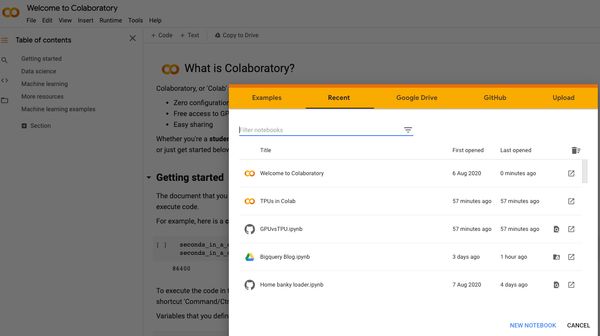
Once you create your new Notebook. In the left menu of Google Colab, upload your JSON key file that we just downloaded. I’ve renamed mine to hide my project id.
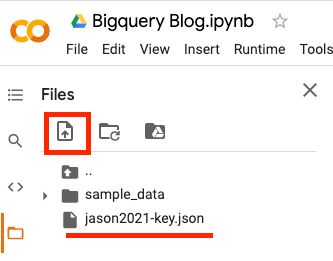
We’re now ready to write our code.
The Python Part
Check the path of our JSON key file. In production we might store it somewhere besides the root folder.
import os
os.listdir()
# we can see our key file is in our root directory
# output:
# ['.config', 'jason2021-key.json', 'sample_data']
Authenticate and import libraries
# import libraries
from google.oauth2 import service_account
from google.cloud import bigquery
# I like pandas gbq because it can infer schema
# https://pandas-gbq.readthedocs.io/en/latest/writing.html#inferring-the-table-schema
import pandas_gbq

# path to your json key file
KEY_PATH = "jason2021-key.json"

# read the credentials from our file
# scopes are not necessary because we defined them in GCP already
CREDS = service_account.Credentials.from_service_account_file(KEY_PATH)

# the client object will be used to interact with BQ
client = bigquery.Client(credentials=CREDS, project=CREDS.project_id)
We’re going to explore the Hacker News stories public data set. Which is simply a table of articles from the Hacker News website.
Read
The BigQuery API passes SQL queries directly, so you’ll be writing SQL inside Python.
# Our SQL Query
Q1 = """
SELECT *
FROM `bigquery-public-data.hacker_news.stories`
LIMIT 1000
"""
# labelling our query job
query_job1 = client.query(Q1)

# results as a dataframe
df1 = query_job1.result().to_dataframe()
df1
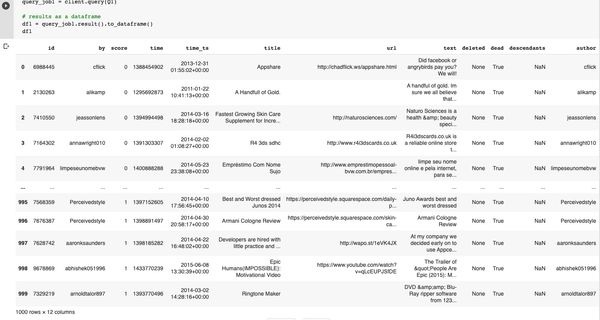
My output below, your data may differ as I’ve selected 1000 entries in no particular order.
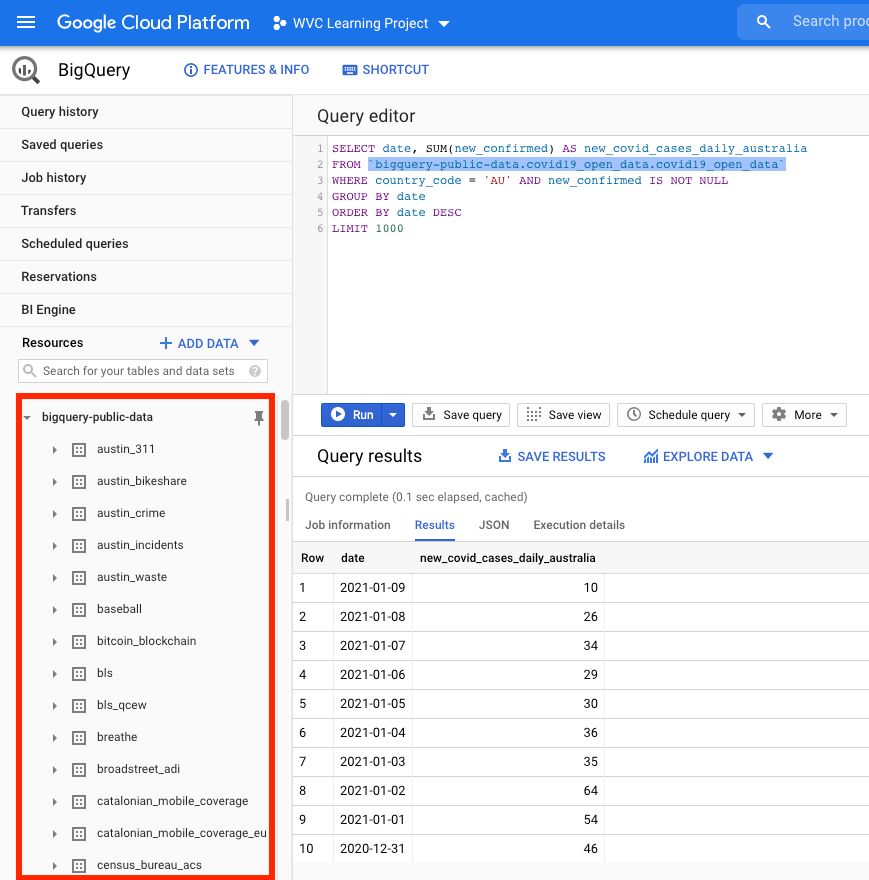
If you’d like to browse all the BigQuery Public data sets you can add them into your BigQuery project by clicking the following link Pin BigQuery Public Data Sets. Now you can browse them all in your “Resources” section. The below screenshot shows a query from the Covid19 dataset for new cases in Australia and the top few datasets in the public data project, the screenshot is unrelated to our work on the Hacker News dataset.
Create / Write
The hierarchy of BigQuery resources is Project > Dataset > Table.
In the above Example:
- Project = bigquery-public-data
- Dataset = covid19_open_data
- Table = covid19_open_data
The structure of the query inside BigQuery platform contains reference to the whole hierarchy, but when we reference a query in Python via the API, we only need to the Dataset and Table because we reference the Project in the client() object.
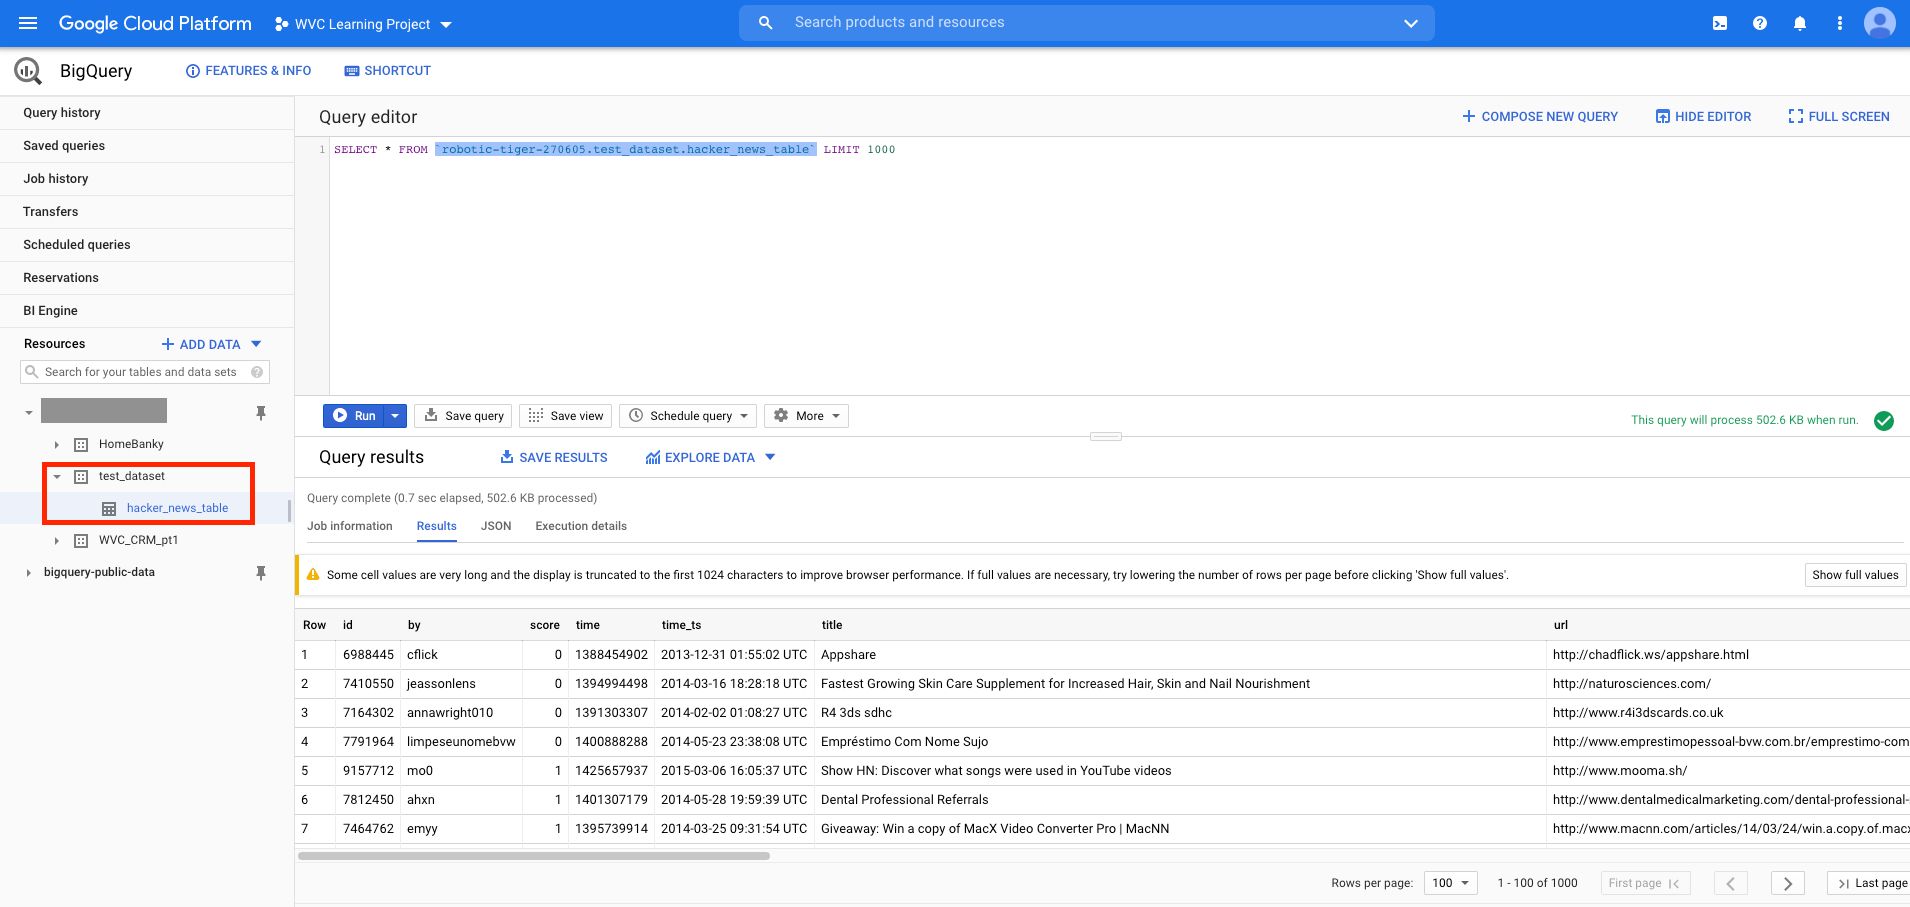
Here we’ll create a new dataset and table inside our Project. The reason we use the pandas_gbq library is because it can imply the schema of the dataframe we’re writing. If we used the regular biquery.Client() library, we’d need to specify the schema of every column, which is a bit tedious to me.
# CREATE / WRITE -- pandas gbq implies schema
# if_exists options = 'fail', 'replace' or 'append'

DATASET_NAME = 'test_dataset'
TABLE_NAME = 'hacker_news_table'

pandas_gbq.to_gbq(dataframe=df1,
                  destination_table=f'{DATASET_NAME}.{TABLE_NAME}',
                  credentials=CREDS,
                  project_id=CREDS.project_id,
                  if_exists='fail')

# output is just the time it took
# 1it [00:03,  3.55s/it]
And when we check BigQuery
Update
Update is part of the DML (Data Manipulation Language) bit of SQL which include Insert, Delete, Merge, etc. Our first step is reading our table, not the table in the public dataset.
# before update we should read from our data from our dataset
# not the public dataset
# Our SQL Query
Q2 = f"""
SELECT *
FROM `{DATASET_NAME}.{TABLE_NAME}`
LIMIT 1000
"""
# labelling our query job
query_job2 = client.query(Q2)

# results as a dataframe
df2 = query_job2.result().to_dataframe()

# we're going to update a certain author's scores
df2[df2['author']=='Perceivedstyle']

# Output:
We're going to +4 to Perceivedstyle's score.
# UPDATE query
Q3 = f"""
  UPDATE {DATASET_NAME}.{TABLE_NAME}
  SET score = score + 4
  WHERE author = 'Perceivedstyle'
"""

query_job3 = client.query(Q3)
# response doesn't return anything
response = query_job3.result()

# to check we have to make another query
# we use the same query Q2 which is just selecting our data
query_job2a = client.query(Q2)
# call our new result df2a
df2a = query_job2a.result().to_dataframe()
# use the same filter to see our update
df2a[df2a['author']=='Perceivedstyle']
df2a
And the result we see our author’s score go from 1 to 5.

Delete
I’ll go through deleting rows and deleting a table. First, deleting rows, say we don’t like posts talking about DVDs.
# Display our data relating to DVDs
df2a[df2a['title'].str.contains('DVD')]
# DELETE rows query
Q4 = f"""
  DELETE FROM {DATASET_NAME}.{TABLE_NAME}
  WHERE title like '%DVD%'
"""

# run the query
query_job4 = client.query(Q4)

# refreshing our data in Python
query_job2b = client.query(Q2)
# call our latest update df2b
df2b = query_job2b.result().to_dataframe()
# Use the same filter to view our data
df2b[df2b['title'].str.contains('DVD')]
df2b
# Output is now empty
Now for deleting a table:
# DELETE TABLE
# not_found_ok=False is the default
# this setting will throw an error if there's no such table found to delete
# we set it to True so the command will run and avoid that error halting our code if need be
query_job5 = client.delete_table(f'{DATASET_NAME}.{TABLE_NAME}', not_found_ok=True)
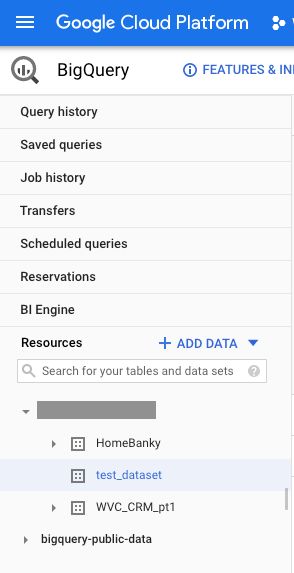
Now we see no table under our test_dataset. We can delete the test_dataset too but I’ll leave that to you to look up.
We can now perform CRUD (Create/Read/Update/Delete) actions on BigQuery with Python 🎉
Let me know if you’d like to see more examples.
Related Posts
How to pull data from the MOAT API using Python
Published 2021-01-04
Ad verification data can be used to confirm if your ads are really being seen or not. MOAT is one of the major players and here is how to use their API.
moatpythonapi
Using the Adobe Analytics v1.4 API with Python -- the older and actually useful API
Published 2020-12-15
Why would Adobe Analytics give us API 2.0 to use, when it doesn't give access to multiple dimensions in a usable way? It's a mystery to me unless I've missed something 🤷 -- API 1.4 (the Omniture API) to the rescue ⛑️
adobe analyticspythonapi